Installing WC Plus
WC Plus is a premium plugin. Once you have successfully purchased it, you will receive a confirmation email containing the ZIP file of the plugin. Download the plugin first. Next, follow the below steps to install and activate the plugin.
Upload and Install
Then, get into your WordPress Dashboard. Navigate to Plugins > Add New. Click the Upload Plugin.
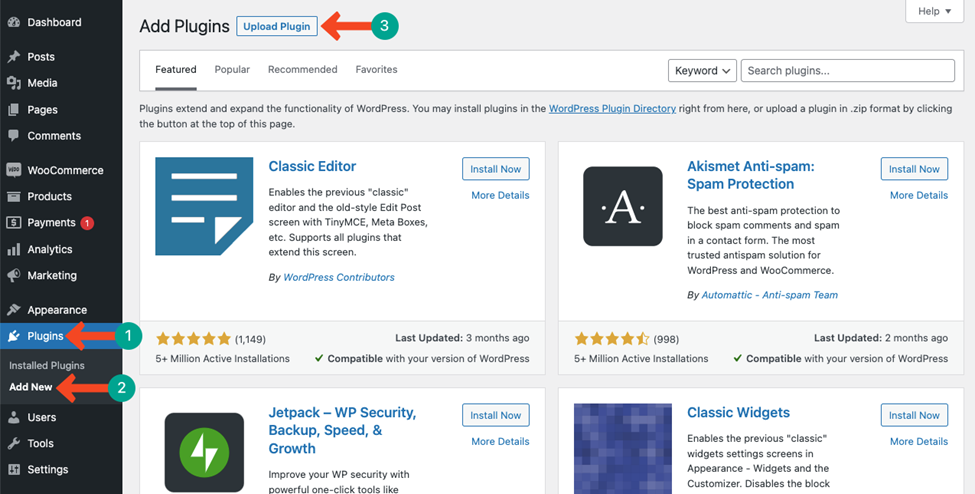
Upload the plugin ZIP file you have downloaded just a while ago. Install and activate the plugin afterward.

Activate Your License Key
As this is a premium plugin, you’ll be asked to place the license key to activate the plugin. You’ll get the license key in the email you’ve received.
Copy-paste the license key in the box and hit the Activate button at the end.

The plugin will now be ready to be configured and customised according to your store’s needs.
Requirements
- WooCommerce 5.6+
- PHP 7.1+
- Supported Browsers
What’s next? Choose Your Layout
Choose from one of our pre-defined layouts, each layout is purpose built from the ground up on your exact type of use case for your WooCommerce website.