The Options menu lets you enable the address autocomplete options and some more customizations. Go to WC Plus > Options. Next, follow the below guide.
1. Optional
You’ll get the address autocomplete options under the Optional tab.
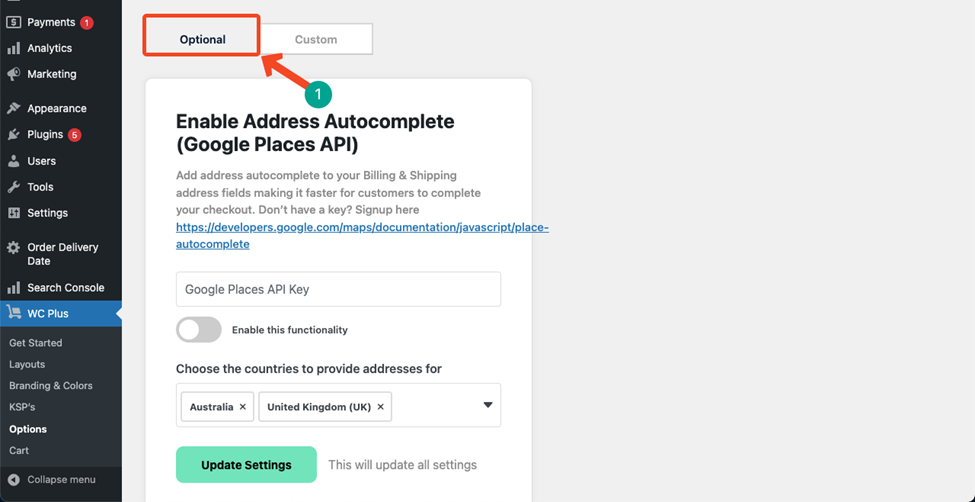
Enable Address Autocomplete (Google Places API)
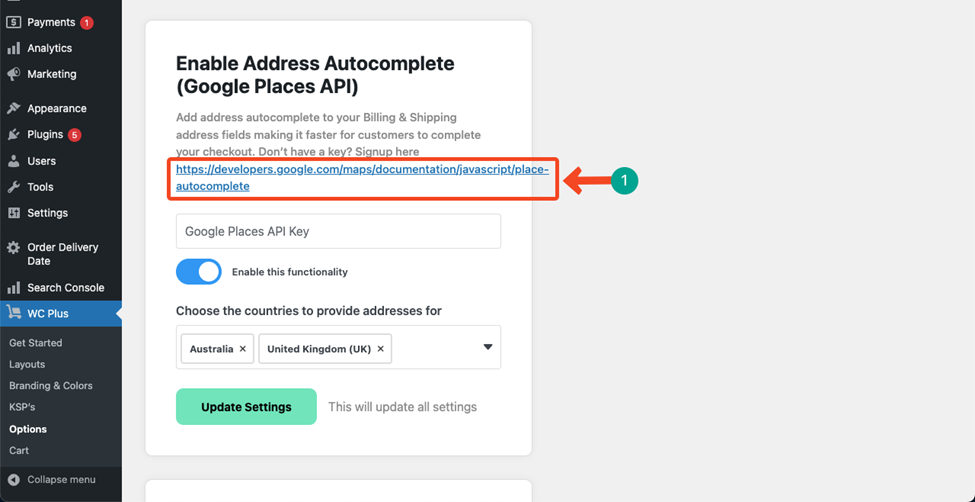
You can enable the address autocomplete to your billing and shipping address fields from here. But for that, you need a Google Places API Key at first. Sign up at this link https://developers.google.com/maps/documentation/javascript/place-autocomplete
You’ll get this link on this page as well. Click on it.
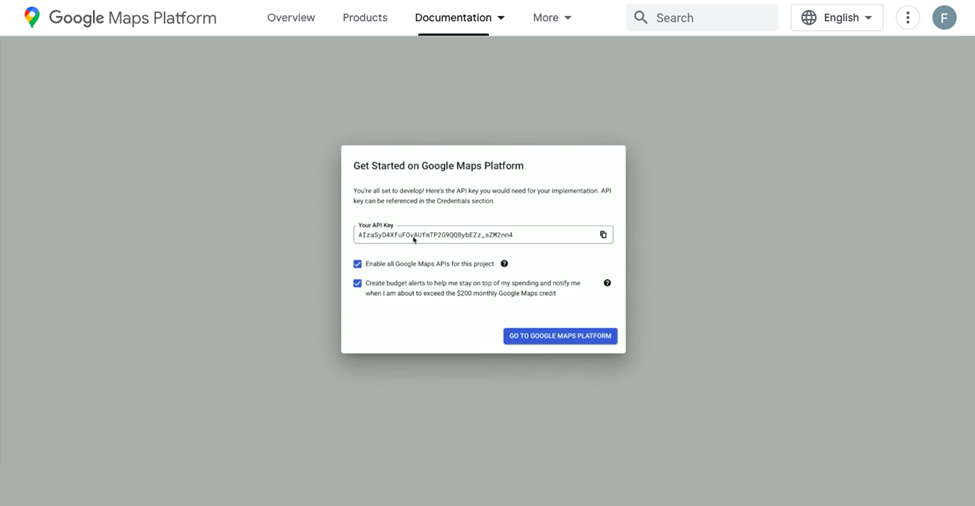
Once the sign-up is done, you will get the API key. Copy the key.
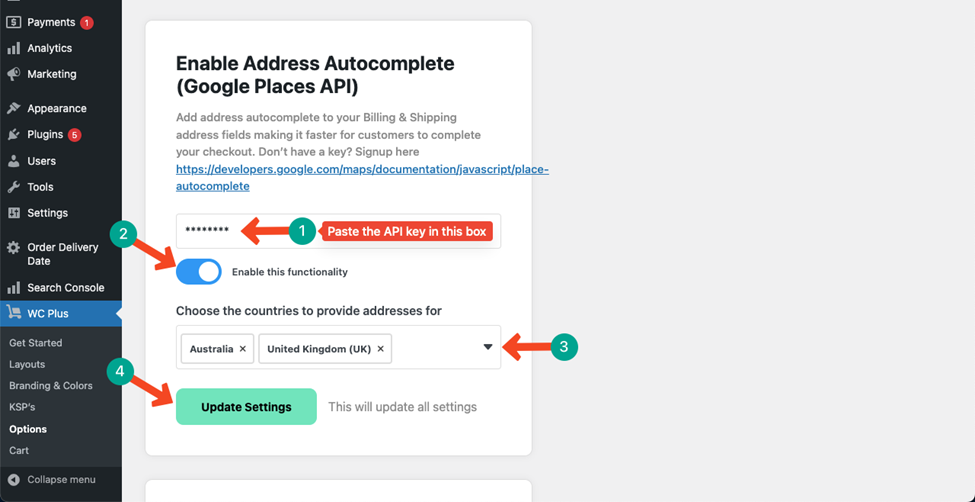
Paste the API key in the box. Toggle on the option. Choose your desired countries for the autocomplete option.
Save changes by hitting the Update Settings button.
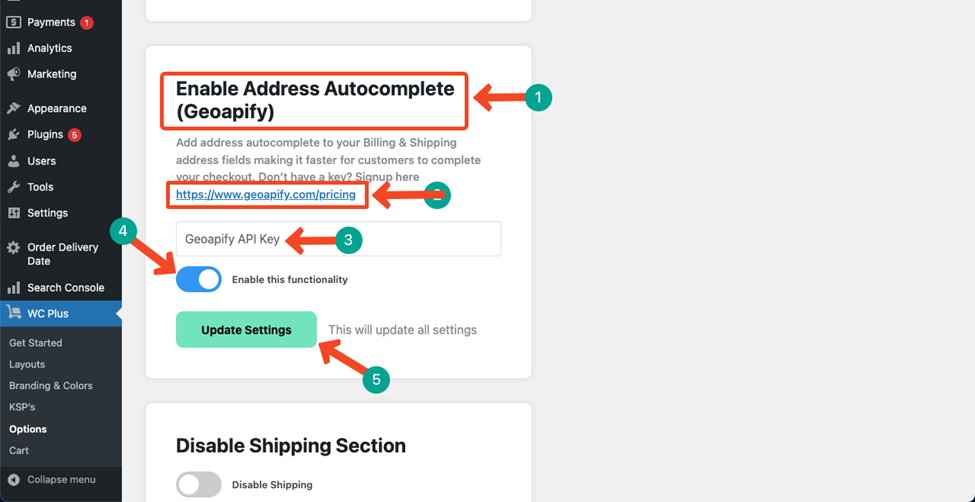
Enable Address Autocomplete (Geoapify)
Geoapify is a geospatial data and location-based services provider. It offers APIs for integrating location-based features into your billing and shipping fields.
Here again, you need a Geoapify API key first. Go and sign up at this address https://www.geoapify.com/pricing.
Once you get the API key, copy and paste it into the Geoapify API key box. Toggle on the option. Save changing by pressing Update Settings button.
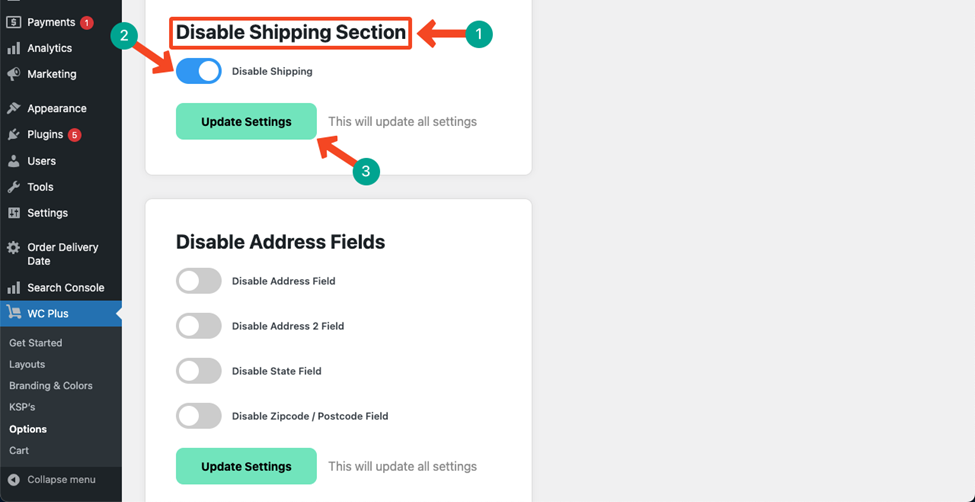
Disable Shipping Section
If you are selling digital products, there’s no need for this shipping option. In this case, you will want to disable the shipping section.
Toggle on the option and press the Update Settings button.
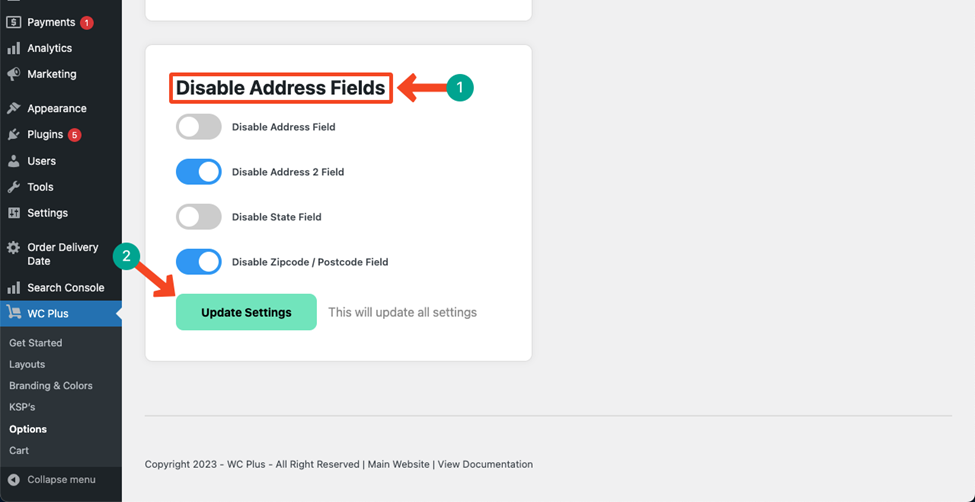
Disable Address Fields
If there is any particular address field you don’t want to display on the checkout page, toggle on the respective ones.
Press the Update Settings button at the end.
2. Custom
Hope you already know the Custom options let you modify further, which isn’t possible with the default options.
Go to the Custom tab. Explore below what you can do here.
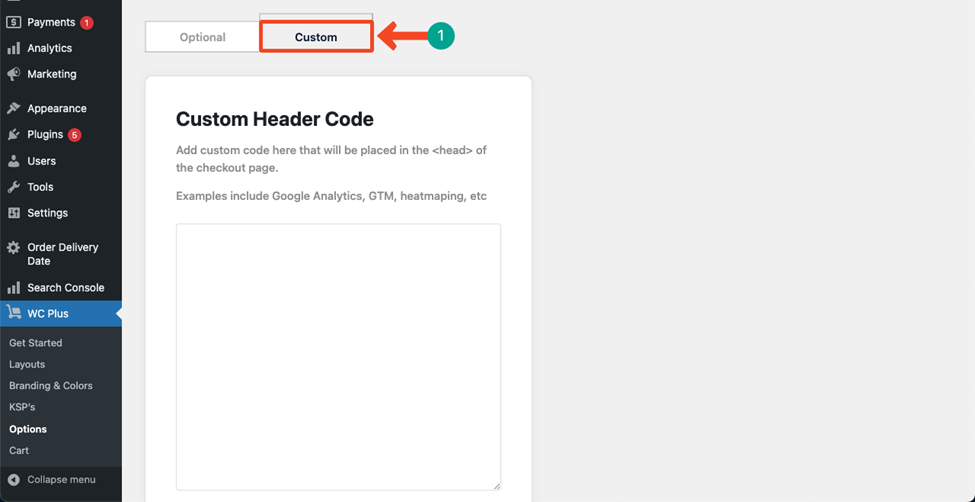
Custom Header Code
You may integrate Google Tag Manager, Heatmapping, and Google Analytics by adding Custom Header Codes into this box.
Save changes by pressing the Update Settings button.

Custom PHP Code
Using Custom PHP Code, you can create and display dynamic content. Add codes into the box and save them by pressing the Update Settings button.

Note: Don’t touch/type any code into these boxes if you aren’t a developer. Any invalid code may crush down your site.
What’s next? Set WC Plus Live, Enable New Features
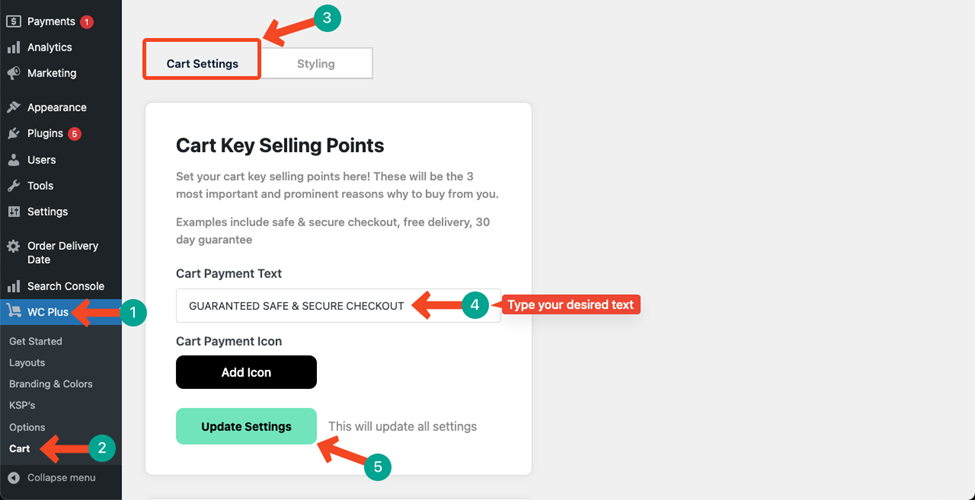
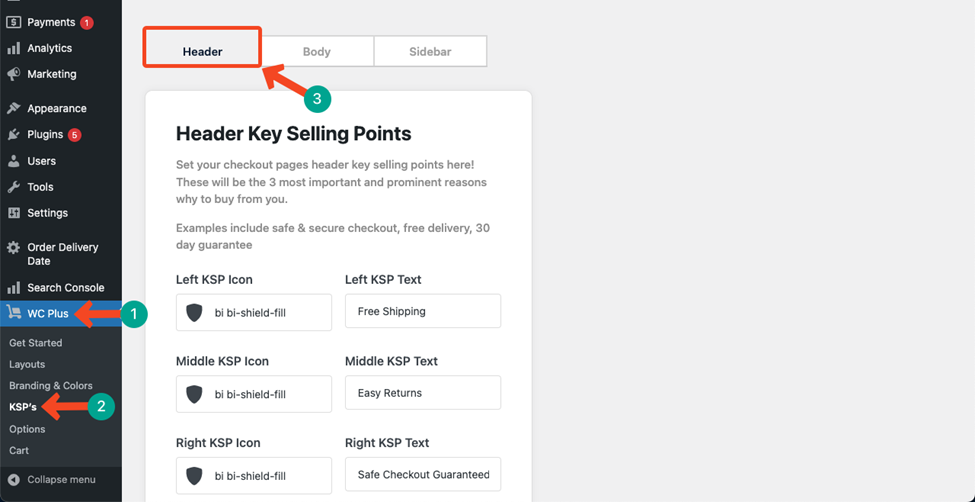
Set the key selling points and other conversion elements in your checkout page, a safe & secure checkout, free delivery, guarantees, etc.