The checkout page has several mandatory parts and options. They are Header, Sidebar, Body, Footer, and Custom. The Branding and Colors tab lets you apply desired colors on each of these options to personalize its appearance. Here’s how to do this.
1. Header
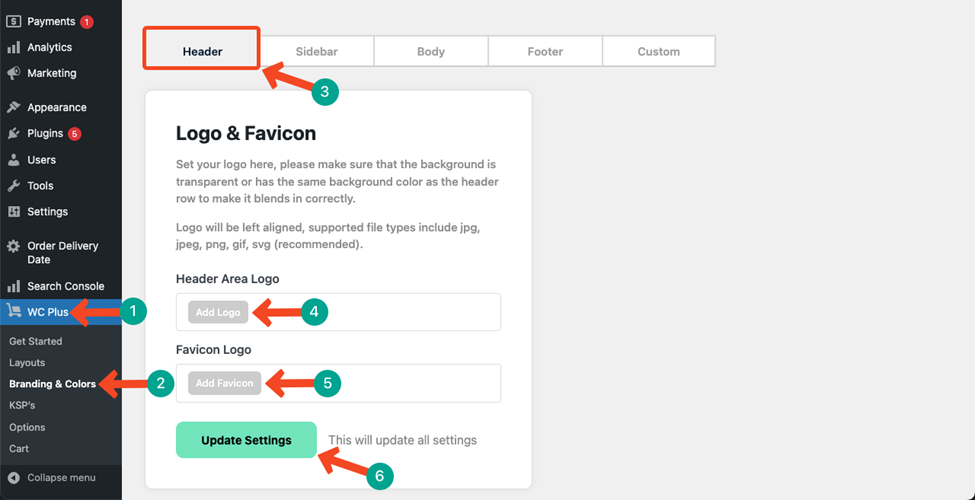
Go to WC Plus > Branding & Colors > Header.
Come to the Logo & Favicon section. You’ll get options to add the Header Area Logo and Favicon Logo.
The Header Area Logo is a symbol placed at the top of your web pages, representing your website or business.
The Favicon Logo is a tiny version of your main logo, appearing in the browser tab when someone visits your site.
Hit the Update Settings button once your logos are uploaded properly.
Header Colors
Header Colors allow you to set the background color, icon color, text color, and mobile top KSP bar background color.
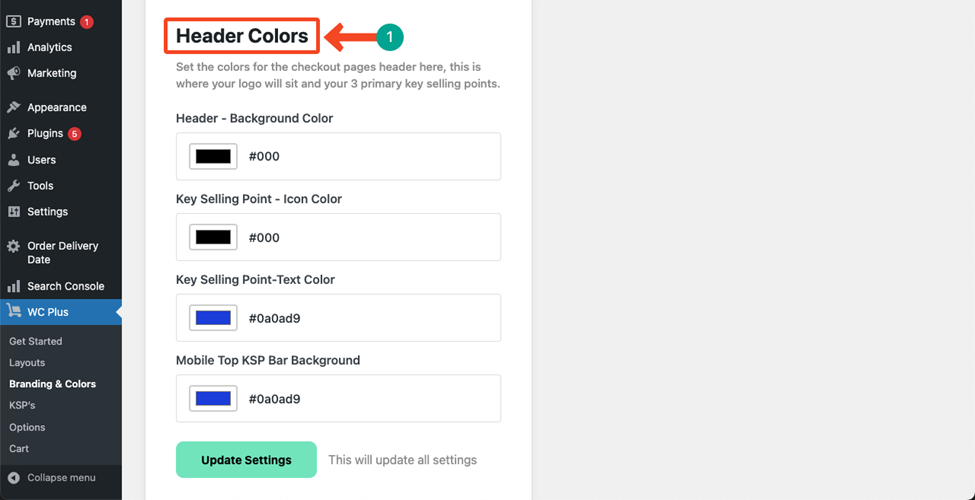
You can direct copy-paste your desired color codes on the boxes or open up the color box and manually select one using the eye-dropper tool.
Hit the Update Settings button at the end.

Promo Header
The Promo Header is a dedicated option at the top of a website that displays special offerings, discounts, and announcements.
This section lets you customize the promo-background color, promo-text color, and promo-text.
The Promo-Text includes the words by which you write the discount offers and special announcements.
Hit the Update Settings button at the end.

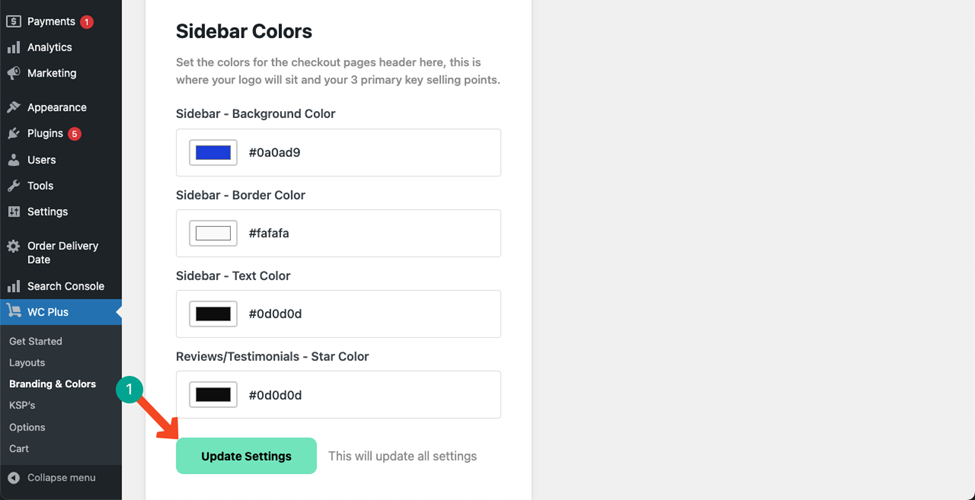
2. Sidebar
Come to the Sidebar tab. You’ll see a sidebar on the checkout page. You can customize the colors of its different parts from this tab.
You can set the sidebar background color, border color, text color, and reviews/testimonials color from this tab.
Press the Update Settings button at the end to save changes.
3. Body
Jump into the Body tab. You can customize the checkout page’s body-background color, body-text link color, and button color from this tab.
Hope you can do it easily. Don’t forget to press the Update Settings button at the end.

4. Footer
The Footer Copyright Text provides legal protection of the web content, images, and elements against any theft. The Footer tab lets you add personalized and branded text-copy on the box.
For linking any particular words on the copy, hit the Add Footer Text & Link button. It will open up two boxes where you can specify the words and link them to specific a post or page.
Press the Update Settings button at the end.

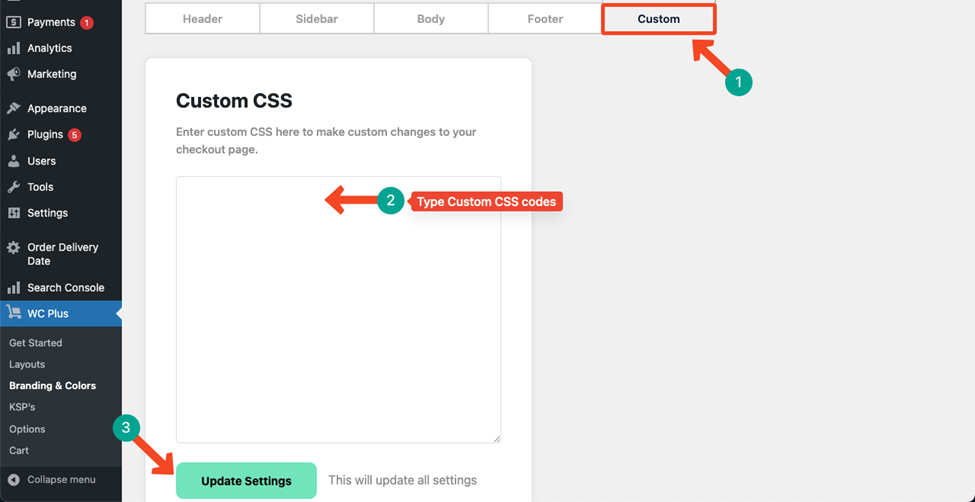
5. Custom CSS
Custom CSS codes allow you to make more adjustments and customizations that aren’t possible to achieve using the default templates and options.
Type your Custom CSS codes in the box and save them by clicking the Update Settings button.
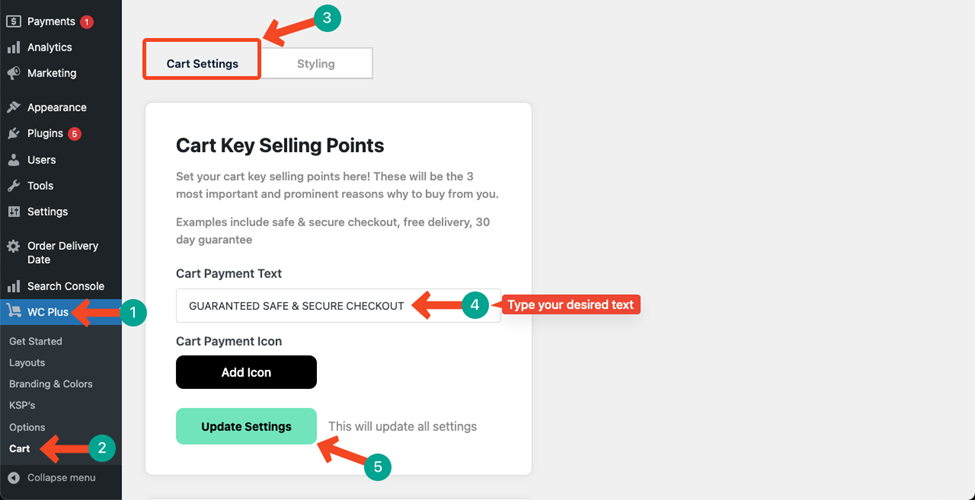
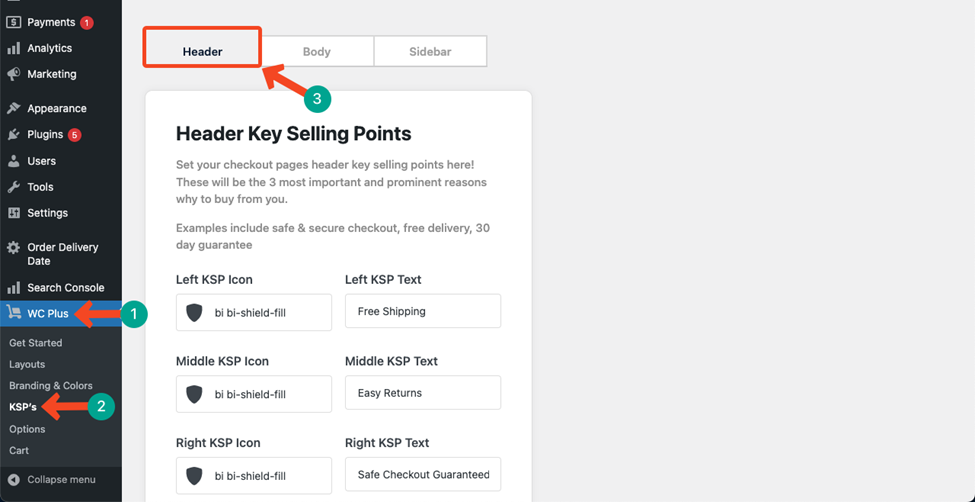
What’s next? Set Key Selling Points (KSPs)
Key Selling Points help you ensure customer trust by configuring specific customizations.